Hello everyone!!!
I KNOW I have been gone for FAR too long but life has been super busy as I am adjusting from being a stay at home mom to a working mom again. I think I'm finally getting the hang of it though :)
Okay, so there's much debate between naturals about using petroleum based products on natural hair. It gets a bad rep because petroleum coats the hair, thus not allowing anything in or out of the hair. In my opinion, that's not a bad thing. Hear me out! Dryness results from moisture escaping from the hair, right? Hair grease prevents anything from escaping the hair... Catch where I'm going with this? When used PROPERLY, hair grease can prevent moisture from escaping your hair! Well, how do you use grease properly? Easy!
1. In order to prevent moisture from escaping, there must be moisture present in the first place. Use a spray bottle and spritz the hair with water. Remember, water is the greatest moisturizer on Earth!
2. Work the water thorough the hair. I usually work it in by smoothing the water through the hair beginning at the roots and working my way down the hair shaft.
3. Once the hair is moisturized to your liking, apply the hair grease. You do not need a bunch of grease. You don't want the hair greasy looking and weighed down. Start with a dime sized amount and increase from there if needed. There shouldn't be a giant grease stain on your child's pillow when she/he wakes up in the morning.
4. Style as usual.
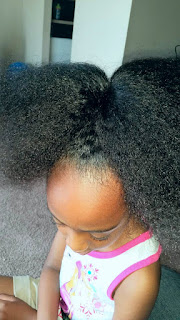
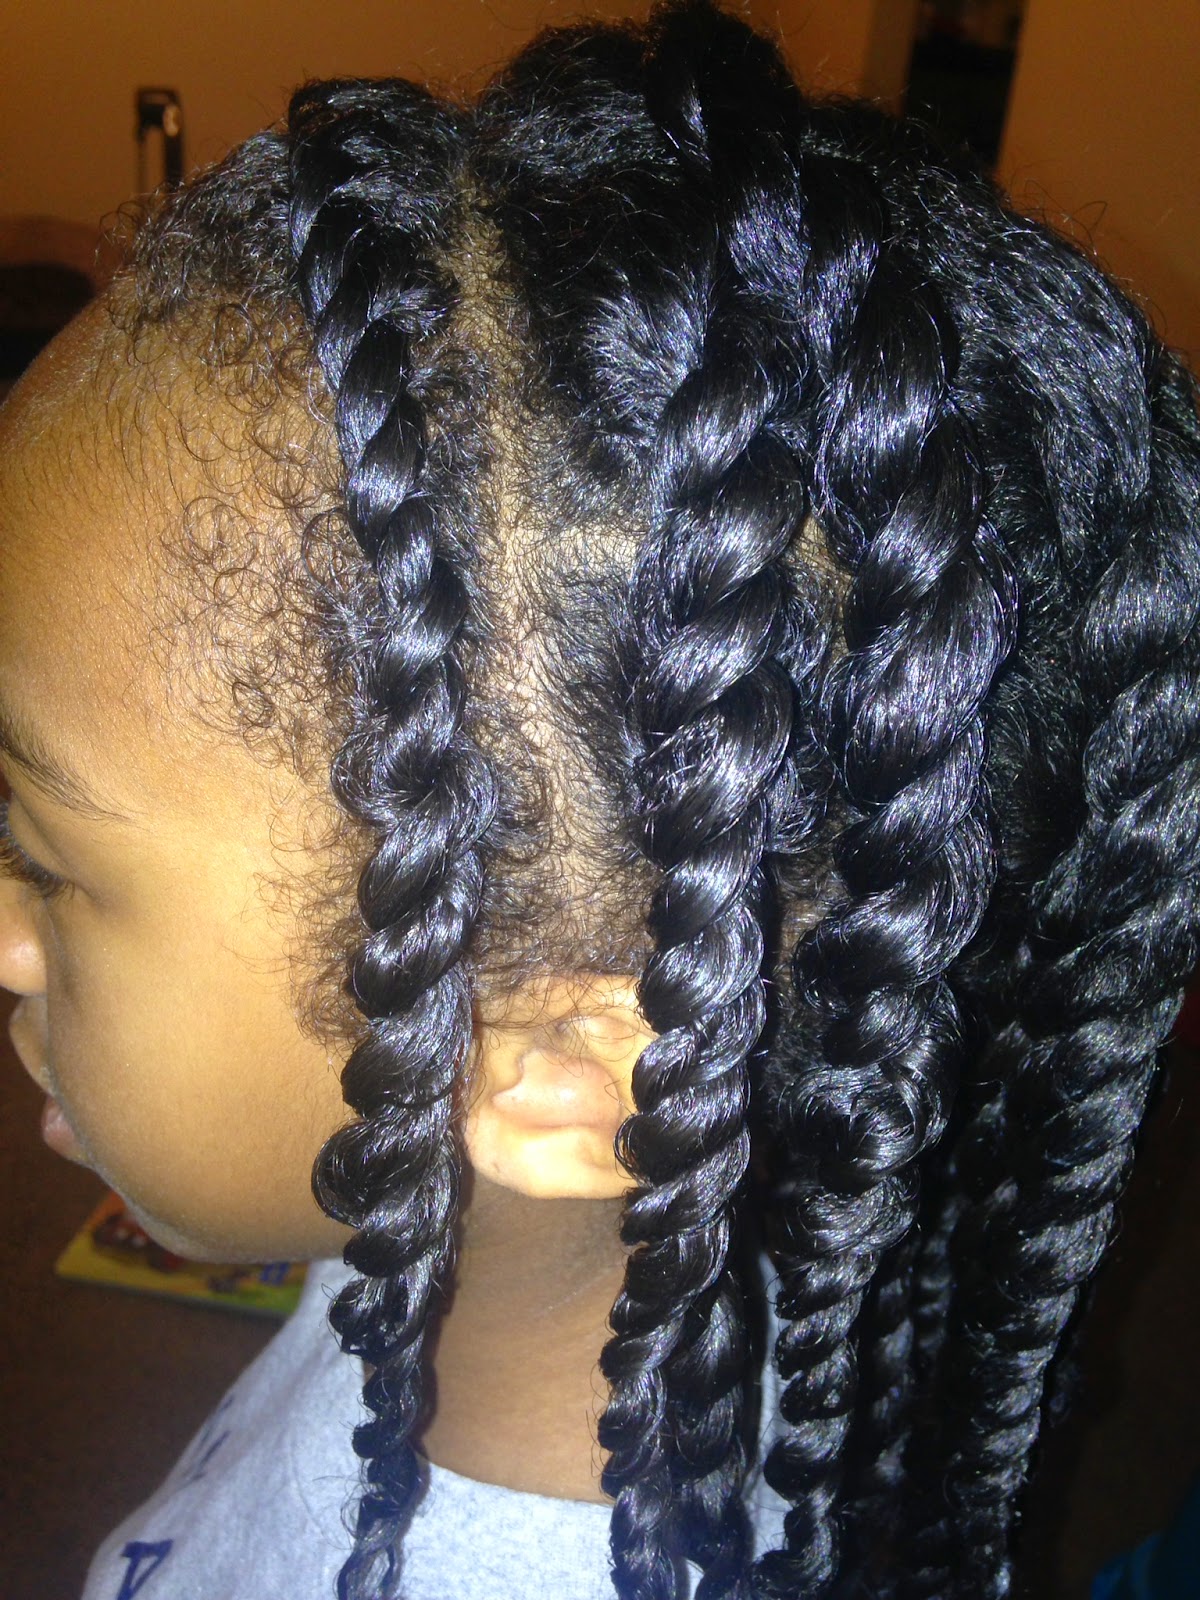
This style was done using water and Blue Magic hair grease. I know the picture isn't that great, it's old, but look at the shine and juiciness of those ponytails and twists! I used this method for the first 5 years of her life and as you can see, she has long, healthy hair. Don't let fads and trends from the natural hair community dictate how you care for you or your child's hair. Do what works for you! No two heads are the same!
If you wrap your child's hair with a satin scarf or bonnet, you shouldn't need to add any more grease for at least 5 days. When restyling my daughter's hair, I'll spritz the hair with a spray bottle and style ONLY because it's easier for me to style her hair when it's damp.
Please note that when you are washing your child's hair after using grease, you may need to use a shampoo containing sulfates to ensure that there's no grease left on the hair shaft. Also, I do not grease her scalp. You don't want the grease to suffocate the hair follicles. It's best to use a light natural oil like coconut oil.
Sound off! Do you use hair grease in your child's hair? Comment below!
KiddieCurls
Saturday, July 18, 2015
Tuesday, June 16, 2015
Product Review: CurlyKids Haircare
Hello!! First and foremost, let me say a huge THANK YOU!!! I have seen so much traffic to the blog and we're almost at 1,000 followers on Instagram! (@KiddieCurls) if you aren't already following :) I will be doing a KiddieCurls 1,000 follower giveaway so stay tuned for that.
I have been meaning to do this product review forever but life gets busy and I'm a bit absentminded but hey, it's here now.
Before I begin, I am not being paid for reviewing this product. I purchased this with my own money. Most importantly, this is my HONEST review of these products. I refuse to give a false review to obtain likes or features or anything else for that matter. I will always be 100% honest with everything that I post or share.
I picked up this product while one day shopping at Dollar General. I had never heard of the product but, with a price of only $4.75 for the leave in conditioner, what did I have to lose? I ended up buying the Curly Creme Conditioner and the Curly Gel Moisturizer. Let me just tell you: I am in LOVE with the leave in! It's super moisturizing and left Amara's hair feeling amazingly soft. The leave is light, not super thick, and it doesn't get that product overload feeling. I love it! I really like the gel as well. It does what a normal gel does but it doesn't leave a tacky, sticky feeling.
Overall, I was thoroughly impressed with both of those products. In fact, I was so impressed that I went to 5 different stores to find the rest of the line. I couldn't find the deep conditioner(not pictured) but I did purchase the Super Detangling Conditioner, Super Detangling Shampoo, and Super Detangling Spray.
Now, when I used this line for Amara's wash day, I was expecting to be blown away. I mean, I loved the first two products, it only made sense that I would love everything else. Well...I was wrong. Very wrong. I literally had to use dang near half the bottle of shampoo just to get it clean! I have NEVER had a problem washing her hair before, no matter the shampoo. The conditioner wasn't very moisturizing nor did it have the slip that I wanted. The detangling spray really didn't help or hurt the detangling process so it was pretty useless. I have not used the shampoo, conditioner, or detangling spray since that day. I was extremely disappointed in the product but I wasn't too upset as I didn't pay much for the set.
So, would I recommend this product? Well, yes and no. I loved the gel and leave in conditioner but hated everything else. Who knows, it may work for your child. Everyone's hair reacts differently to products.
Have you had success with CurlyKids Haircare products? Let me know below!
Follow KiddieCurls on Instagram: @KiddieCurls
For more product information visit http://curlykidshaircare.com/
Monday, June 8, 2015
Hair Bow Bun Pictorial
Hair Bow Pictorial!!!
Hey guys!!
So here is the pictorial that I promised you all. I'm going to keep it short and sweet.
PRODUCTS NEEDED: A brush, an Ouchless hair tie, gel or edge control, and bobby pins.
For this style, I washed and conditioned Amara's hair then blow dried it to stretch the hair. Blow drying is completely optional. If you are going to blow dry, remember to use a heat protectant!
PRODUCTS NEEDED: A brush, an Ouchless hair tie, gel or edge control, and bobby pins.
For this style, I washed and conditioned Amara's hair then blow dried it to stretch the hair. Blow drying is completely optional. If you are going to blow dry, remember to use a heat protectant!
1. Brush the hair into a high ponytail. Position the ponytail where you would want the bow to sit on your child's head. I wanted the bow at the top of her head so I made sure the ponytail was sitting on the top of her head.
Make sure that your child's edges are slicked down and neat. I used Eco Styler Olive Oil Gel for her edges.
2. Divide the ponytail in to two even sections
3. Take an equal amount of hair from both of the separated sections to make a smaller third section.
Keep the hair separated by twisting the two equal sections, leaving the third section free.
4. Now you're going to braid that third section. Just a regular three strand braid.
5. Next, flip the braid on top of the center part of your "bow". This is going to help define the bow shape. Use bobby pins to pin the excess braid or tuck it into the ponytail.
6. Now you are going to create the bow shape. Take one section of hair and twist it very loosely so that only the ends are twisted.
7. Take the twist and fold it back so that the end of the twist is behind the ponytail. Adjust to your desired shape and pin.
8. Do the same for the next section, adjusting the sides of the bow to get your desired shape.
That's it!!
Thank you for reading my blog! Please, if you have any suggestions, questions, comments, or things you would like to see featured on this blog, please leave them in the comment section!
IG: @kiddiecurls
Friday, June 5, 2015
Moisturizing Your Child's Natural Hair
Thank you all for supporting this blog and the Instagram page @kiddiecurls (Might want to follow now if you haven't already *hint-hint*) I've received a ton of questions on how to keep your child's hair moisturized. Well, I'll explain it all right here.
MOISTURIZING!
This is probably one of the most important things that you will need to know while caring for natural hair. Because of our many kinks, curls, and waves, it makes it difficult for the oil (sebum) that our scalps make naturally to travel down the hair shaft. This is why those with textured hair often have dry hair.
Okay, now that the science is behind us, my regimen for keeping Amara's hair moisturized is actually extremely simple.
1. ALWAYS START WITH WATER!!
Good ol' H2O is the best moisturizer on 'the planet. Period. Best of all, it's free!! Look at whatever you use to moisturize your children's hair. Water is usually ALWAYS the first ingredient. If it's not then that product does not truly moisturize. (Oils are NOT moisturizers, they are sealants. We'll get into that in a second.) Whatever I'm doing to Amara's hair with the exception of straightening it, I always begin with water. I just use my spray bottle and spritz away. Feel free to mix in your favorite oil or glycerin in your spray bottle if you'd like. It's not really necessary in my opinion.
2. SEAL THAT MOISTURE IN!
This step is just as important as using water. Here is where you would add your oil, grease, shea butter, etc... or whatever you use to "trap" the water in. Without sealing the water in, it will just evaporate and you'll be left with dry hair.
Now, there's been fuss over what you should be allowed to use in your hair if you're natural. Let me just say this; use what works for you! Way before I knew ANYTHING about natural hair care, I always spritzed A.Lynn's hair with water then applied Blue Magic before styling. I used that for 5 years and her hair was flourishing. If you want to use hair grease on your child's hair, IT'S OKAY!! Hell, our parents and grandparents used grease on us and we were fine! (Okay, rant over lol).
I love hair grease for Amara's hair. It works better than some oils because I don't have to re-moisturize as often. (I'm a lazy natural). However, I tried a new product, FroButter for kids and it absolutely won me over! (Click here for my FroButter review.) It keeps her hair moisturized for the entire week and doesn't weigh the hair down nor makes it greasy.
Look at how juicy those twists are! This style lasted her a week and I only had to moisturize and seal once!
So it's really that simple. Moisturize with water and seal with an oil, butter, grease, or styler of choice!
Wednesday, May 13, 2015
Product Review: Fro Butter Baby for Curly Kids
Hey guys!
I hope all of you mommies had a wonderful Mother's Day and that you didn't have to lift a single finger. (That does still happen, right?) Well anyway, I have a product that I want to share with you all. It's called Fro Butter and I must say, I love it! It has tons of awesome ingredients, it's all organic, and it smells like heaven. Now, before I go any further, let me give a little background on the relationship between Fro Butter and I.
About a month ago, I entered Amara into an Instagram contest to become a baby brand ambassador for Fro Butter. To my excitement, she was selected and in turn we were sent a product to use and review. Let me also say I am NOT being paid for this. I am a person of integrity and would NEVER give a false product review NOR endorse a product that I would not use in my own daughter's hair. This review is completely my honest opinion of the product. Also, keep in mind that what works for one head of hair may not work so well for another and vice versa. There are products that my hair hates that works absolutely well for Amara's hair. It's really a game of trial and error.
Now that the formalities are out of the way, let's talk about this Fro Butter!
Honestly, I didn't know much about the product or the brand when I entered to become the baby brand ambassador. I know, that's bad. ALWAYS research a company before you agree to test their products on you or your child's hair. Luckily, I was able to do enough research on the company via FroButter.com to where I felt comfortable trying the product on my child's hair.
When I received the product, the first thing I did was look at the ingredients. They are listed as follows: Organic Shea Butter, Organic Vegetable Glycerin, Organic Pumpkin Seed Oil, Organic Carrot Seed Oil, Organic Coconut Oil, Organic Lavender Oil, and Fragrance. I love that for one, I can pronounce all of the ingredients lol, all of the ingredients are organic, and that I didn't have to Google an ingredient to see what the heck it was.
Next, I smelled the product. Let me just say it smells delicious, but not in an 'eat me' sort of delicious. The fragrance is very light and not overpowering or strong. Perfect for your little ones. The consistency is surprisingly very smooth and not too thick as one would expect a shea butter product to be. It's creamy, and absorbs well into the hair; it sort of melts into the hair.
I used the Fro Butter Baby on freshly washed hair. I did not use a leave in or anything else, just applied the Fro Butter directly to her damp hair. The next day Amara's hair was extremely moisturized! I was impressed because usually I have to layer products in order to achieve that level of moisture. Very impressive! Below are pictures of the style I did on Amara's hair with the Fro Butter Baby. Notice the shine and the 'juiciness' of her curls. All of this with ONE product!!
So, do I recommend this product? YES!! With all natural organic ingredients, great smell, and incredibly moisturizing, Fro Butter Baby does everything it says it would. And because I love it so much, I will be including this product in a future giveaway. Be on the lookout for that announcement!!
Wednesday, April 29, 2015
Achieving the PERFECT twist out
Hey guys!
I know it's been a while since my last post but I'm back, finally! Today I'm going to show you how to do a real simple style, a two strand twist out. I promise you it's super quick and easy and when done right you'll achieve AH-MAZ-ING results.
Okay let's get started.
Here's what you need: A spray bottle (mine contains a mix of glycerin and water)
Shea Moisture Curl Enhancing Smoothie
Oil of your choice. I used coconut oil
An afro pic for fluffing
Optional: ORS Olive Oil Edge Control to smooth edges
Optional: Perm rods
Okay first start with thoroughly detangled hair. Amara's hair was not freshly washed when I did this style. Next, you're going to grab a section of hair to start a two strand twist. If you want a more defined look, grab smaller sections. If you're looking for a chunky, more wavy twist out, grab larger sections. For Amara, I wanted a defined look so I used smaller sections.
Once you've decided what sized section you're going to work with, spray it with the spray bottle until damp then add a dime sized amount of the Shea Moisture Curl Enhancing Smoothie making sure that the product is thoroughly worked through the hair. Now you begin to two strand twist the hair down the entire length of the hair.
If you need instructions on how to two strand twist, check out this video. https://youtu.be/lAFV9yRoa3o
Once you have twisted the hair, finger coil the ends so that you're not left with undefined ends. If you'd like, you may add perm rods to the ends of the twists to ensure that they are defined. They should look something like this:
It should look something like this.
I know it's been a while since my last post but I'm back, finally! Today I'm going to show you how to do a real simple style, a two strand twist out. I promise you it's super quick and easy and when done right you'll achieve AH-MAZ-ING results.
Okay let's get started.
Here's what you need: A spray bottle (mine contains a mix of glycerin and water)
Shea Moisture Curl Enhancing Smoothie
Oil of your choice. I used coconut oil
An afro pic for fluffing
Optional: ORS Olive Oil Edge Control to smooth edges
Optional: Perm rods
Once you've decided what sized section you're going to work with, spray it with the spray bottle until damp then add a dime sized amount of the Shea Moisture Curl Enhancing Smoothie making sure that the product is thoroughly worked through the hair. Now you begin to two strand twist the hair down the entire length of the hair.
If you need instructions on how to two strand twist, check out this video. https://youtu.be/lAFV9yRoa3o
Once you have twisted the hair, finger coil the ends so that you're not left with undefined ends. If you'd like, you may add perm rods to the ends of the twists to ensure that they are defined. They should look something like this:
Continue to two strand twist the hair until only the front along the hairline is left. I chose to flat twist these sections to ensure that the root is defined as well. From experience, I have found that choosing to just two strand twist along the hairline leaves her hair looking puffy and kind of sweated out looking.
For a video on how to flat twist, click here. https://youtu.be/e5UIvm4d0Qw
It should look something like this.
Okay, now that that's all done, you may either sit your child under a dryer until completely dry or tie a satin scarf around it and let it dry overnight.
Once the twists are COMPLETELY dry, you may begin unraveling them carefully. Add a little oil to your fingers to reduce frizz. Unraveling damp twists will result in frizz FYI. When you're finished unraveling the twists, grab that pic and fluff! Fluff it until you've reached your desired shape and body. Apply edge control to the edges to achieve a sleeker look.
That's it! Here's how Amara's twist out came out:
Please comment and share!
Thank you!!
Saturday, April 25, 2015
Flat Ironing with NO HEAT DAMAGE
KiddieCurls has arrived!!
Guys, I have been talking about starting this blog for such a long time it's ridiculous! But now it's here and I couldn't be more excited! The reason I chose to start this blog is because there are so many moms out there who really don't know how to PROPERLY take care of their daughter's hair. I mean, most of us either relax our hair or wear it straight and have no clue on how to deal with textured hair. That's fine! It's a completely different ball game. I didn't learn how to properly care for my daughter's hair until I stopped getting relaxers. I didn't do horribly but there are definitely some things I wish I had known. So, with that being said, let's jump right into our first topic inspired by a question my friend asked me today.
With Easter right around the corner, I know many of us mommies want our daughters to have sleek and flowing "Easter Hair". I'm sending Amara to the shop this year out of laziness and she needs a trim but I have done it myself in prior years.
Here's how you can achieve fabulous flat ironed hair on your little one:
1. Thoroughly wash your child's hair. Not co-wash, no you need shampoo for this. We need the hair to be as clean as possible. If you choose to use a clarifying shampoo for extra cleanliness that's fine. The moisture will be restored later. Personally, I used Pantene Clarifying Shampoo.
2. Deep condition. This is where we're going to restore that lost moisture. You should deep condition for at least 30 minutes using a heat source. The heat allows the hair cuticle to open up and absorb all of the moisture. If you don't have a hooded dryer, you can buy a bonnet attachment for your blow dryer. I got one for like $10. (I'll post a picture below) Rinse with cool water...well as cool as your baby will allow.
3. Apply a heat protectant. Guys, this is probably the most important step. A heat protectant is going to act as a barrier between the flat iron and your baby's hair. Not using a heat protectant will result in heat damage eventually. For me it happened immediately. We're all about HEALTHY hair care so please invest in a heat protectant. *Read the directions for how to use your heat protectant. Some recommend applying before blow drying and again before flat ironing.*
4. Blow Dry. For me, how well I blow dry Amara's hair will affect how straight her hair gets when flat ironing. This may not be for everyone but it is for me. I blow dry using a paddle brush with the dryer set to warm. You may choose to blow dry using the tension method if that works best for you or the banding method if you want to reduce the amount of heat you're using. *If you need more moisture in your child's hair, you may add a leave in before blow drying*
5. Flat Iron. Let me stress the importance of using a QUALITY flat iron. You may have to shell out a few bucks for it. I use the CHI flat iron (aprox $115). Use small sections, no wider than your flat iron plates. It should only take one pass to get the hair straight, two MAX.
Following these steps should leave your child with salon looking straight hair with no heat damage.
Hope you all enjoyed! Please comment and tell me your thoughts. Be honest with me so that I may improve where needed.
*Here's the brand that I have. I purchased it from my local beauty supply for $9.99.*
Guys, I have been talking about starting this blog for such a long time it's ridiculous! But now it's here and I couldn't be more excited! The reason I chose to start this blog is because there are so many moms out there who really don't know how to PROPERLY take care of their daughter's hair. I mean, most of us either relax our hair or wear it straight and have no clue on how to deal with textured hair. That's fine! It's a completely different ball game. I didn't learn how to properly care for my daughter's hair until I stopped getting relaxers. I didn't do horribly but there are definitely some things I wish I had known. So, with that being said, let's jump right into our first topic inspired by a question my friend asked me today.
Flat Ironing with NO HEAT DAMAGE
With Easter right around the corner, I know many of us mommies want our daughters to have sleek and flowing "Easter Hair". I'm sending Amara to the shop this year out of laziness and she needs a trim but I have done it myself in prior years.
Here's how you can achieve fabulous flat ironed hair on your little one:
1. Thoroughly wash your child's hair. Not co-wash, no you need shampoo for this. We need the hair to be as clean as possible. If you choose to use a clarifying shampoo for extra cleanliness that's fine. The moisture will be restored later. Personally, I used Pantene Clarifying Shampoo.
2. Deep condition. This is where we're going to restore that lost moisture. You should deep condition for at least 30 minutes using a heat source. The heat allows the hair cuticle to open up and absorb all of the moisture. If you don't have a hooded dryer, you can buy a bonnet attachment for your blow dryer. I got one for like $10. (I'll post a picture below) Rinse with cool water...well as cool as your baby will allow.
This is the line I like to use for shampooing and deep conditioning Amara's hair
3. Apply a heat protectant. Guys, this is probably the most important step. A heat protectant is going to act as a barrier between the flat iron and your baby's hair. Not using a heat protectant will result in heat damage eventually. For me it happened immediately. We're all about HEALTHY hair care so please invest in a heat protectant. *Read the directions for how to use your heat protectant. Some recommend applying before blow drying and again before flat ironing.*
4. Blow Dry. For me, how well I blow dry Amara's hair will affect how straight her hair gets when flat ironing. This may not be for everyone but it is for me. I blow dry using a paddle brush with the dryer set to warm. You may choose to blow dry using the tension method if that works best for you or the banding method if you want to reduce the amount of heat you're using. *If you need more moisture in your child's hair, you may add a leave in before blow drying*
5. Flat Iron. Let me stress the importance of using a QUALITY flat iron. You may have to shell out a few bucks for it. I use the CHI flat iron (aprox $115). Use small sections, no wider than your flat iron plates. It should only take one pass to get the hair straight, two MAX.
Following these steps should leave your child with salon looking straight hair with no heat damage.
Hope you all enjoyed! Please comment and tell me your thoughts. Be honest with me so that I may improve where needed.
*Here's the brand that I have. I purchased it from my local beauty supply for $9.99.*
Subscribe to:
Posts (Atom)