Wednesday, April 29, 2015

Achieving the PERFECT twist out


Hey guys!

I know it's been a while since my last post but I'm back, finally! Today I'm going to show you how to do a real simple style, a two strand twist out. I promise you it's super quick and easy and when done right you'll achieve AH-MAZ-ING results.

Okay let's get started.

Here's what you need: A spray bottle (mine contains a mix of glycerin and water)


Shea Moisture Curl Enhancing Smoothie


Oil of your choice. I used coconut oil

An afro pic for fluffing

Optional: ORS Olive Oil Edge Control to smooth edges


Optional: Perm rods


Okay first start with thoroughly detangled hair. Amara's hair was not freshly washed when I did this style. Next, you're going to grab a section of hair to start a two strand twist. If you want a more defined look, grab smaller sections. If you're looking for a chunky, more wavy twist out, grab larger sections. For Amara, I wanted a defined look so I used smaller sections.

Once you've decided what sized section you're going to work with, spray it with the spray bottle until damp then add a dime sized amount of the Shea Moisture Curl Enhancing Smoothie making sure that the product is thoroughly worked through the hair. Now you begin to two strand twist the hair down the entire length of the hair.

If you need instructions on how to two strand twist, check out this video. https://youtu.be/lAFV9yRoa3o

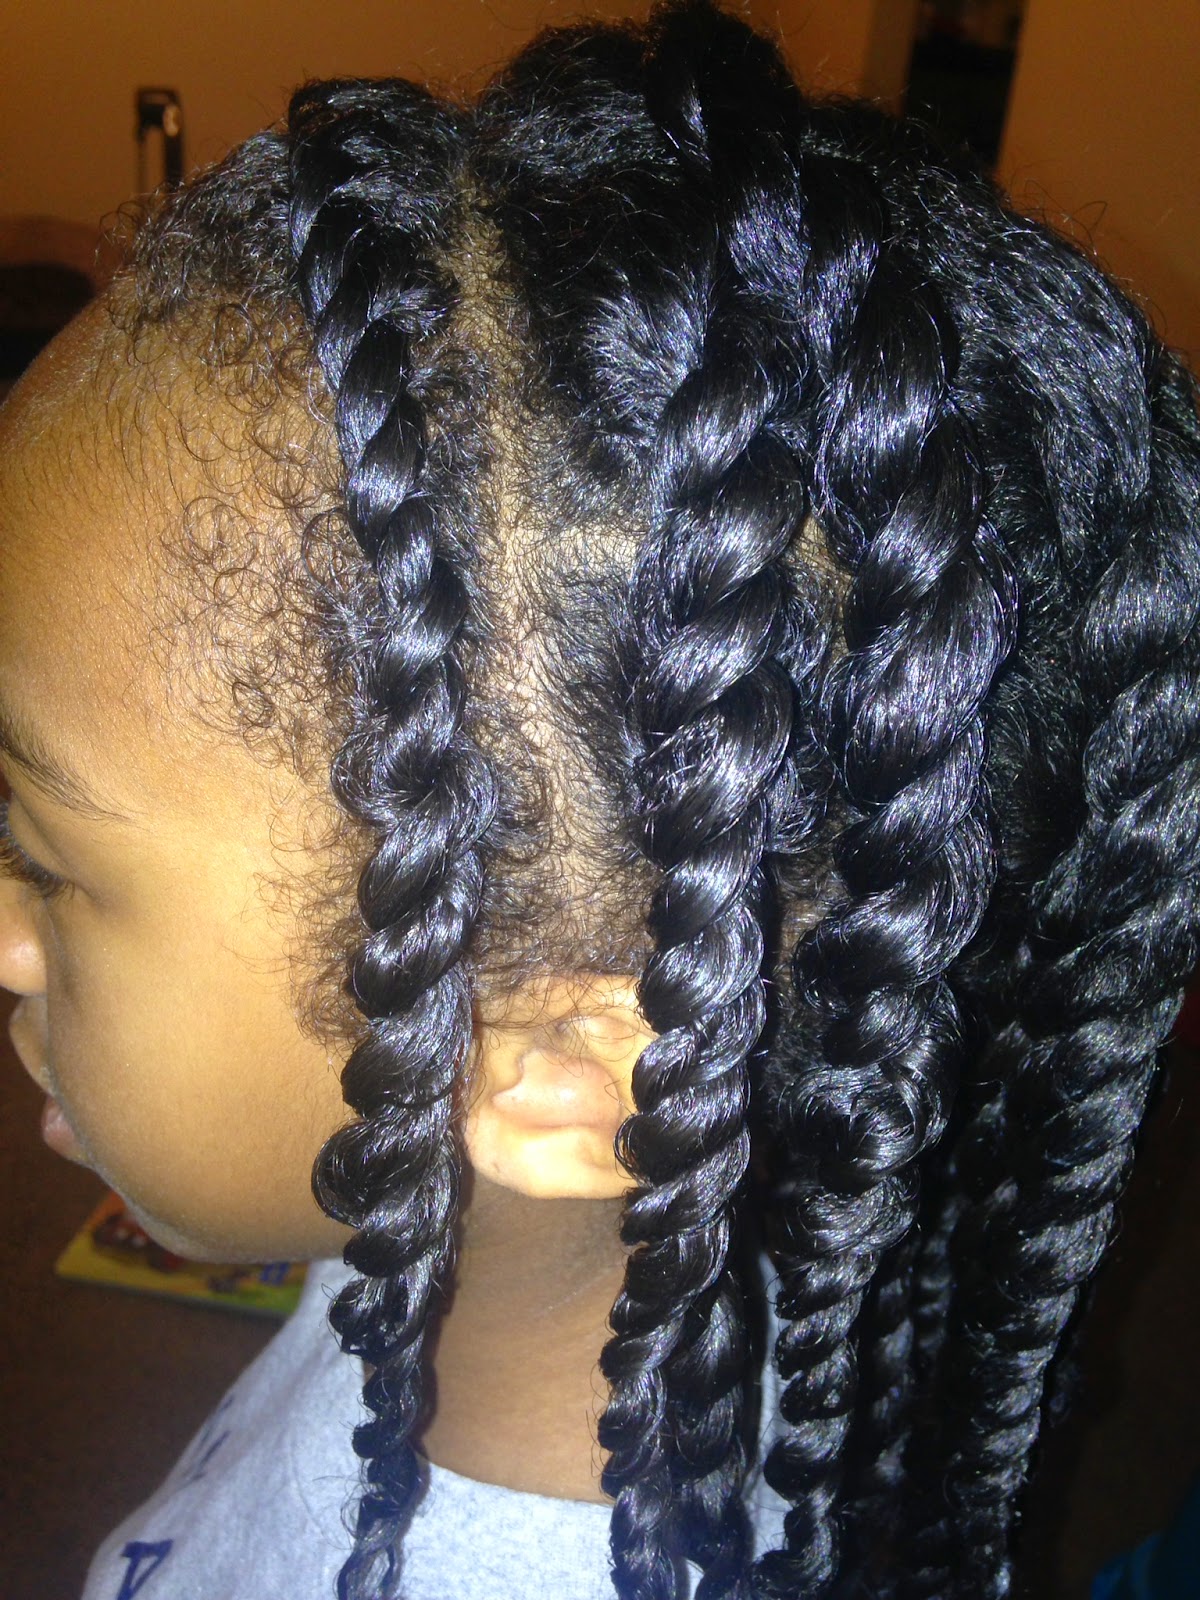
Once you have twisted the hair, finger coil the ends so that you're not left with undefined ends. If you'd like, you may add perm rods to the ends of the twists to ensure that they are defined. They should look something like this:


Continue to two strand twist the hair until only the front along the hairline is left. I chose to flat twist these sections to ensure that the root is defined as well. From experience, I have found that choosing to just two strand twist along the hairline leaves her hair looking puffy and kind of sweated out looking. 
For a video on how to flat twist, click here. https://youtu.be/e5UIvm4d0Qw

It should look something like this.


Okay, now that that's all done, you may either sit your child under a dryer until completely dry or tie a satin scarf around it and let it dry overnight.  

Once the twists are COMPLETELY dry, you may begin unraveling them carefully. Add a little oil to your fingers to reduce frizz. Unraveling damp twists will result in frizz FYI. When you're finished unraveling the twists, grab that pic and fluff! Fluff it until you've reached your desired shape and body. Apply edge control to the edges to achieve a sleeker look. 

That's it! Here's how Amara's twist out came out:


Please comment and share!

Thank you!!


Saturday, April 25, 2015

Flat Ironing with NO HEAT DAMAGE


KiddieCurls has arrived!!

Guys, I have been talking about starting this blog for such a long time it's ridiculous! But now it's here and I couldn't be more excited! The reason I chose to start this blog is because there are so many moms out there who really don't know how to PROPERLY take care of their daughter's hair. I mean, most of us either relax our hair or wear it straight and have no clue on how to deal with textured hair. That's fine! It's a completely different ball game. I didn't learn how to properly care for my daughter's hair until I stopped getting relaxers. I didn't do horribly but there are definitely some things I wish I had known. So, with that being said, let's jump right into our first topic inspired by a question my friend asked me today. 


Flat Ironing with NO HEAT DAMAGE


With Easter right around the corner, I know many of us mommies want our daughters to have sleek and flowing "Easter Hair". I'm sending Amara to the shop this year out of laziness and she needs a trim but I have done it myself in prior years. 

Here's how you can achieve fabulous flat ironed hair on your little one:

1. Thoroughly wash your child's hair. Not co-wash, no you need shampoo for this. We need the hair to be as clean as possible. If you choose to use a clarifying shampoo for extra cleanliness that's fine. The moisture will be restored later. Personally, I used Pantene Clarifying Shampoo.

2. Deep condition. This is where we're going to restore that lost moisture. You should deep condition for at least 30 minutes using a heat source. The heat allows the hair cuticle to open up and absorb all of the moisture. If you don't have a hooded dryer, you can buy a bonnet attachment for your blow dryer. I got one for like $10. (I'll post a picture below) Rinse with cool water...well as cool as your baby will allow. 


This is the line I like to use for shampooing and deep conditioning Amara's hair

3. Apply a heat protectant. Guys, this is probably the most important step. A heat protectant is going to act as a barrier between the flat iron and your baby's hair. Not using a heat protectant will result in heat damage eventually. For me it happened immediately. We're all about HEALTHY hair care so please invest in a heat protectant. *Read the directions for how to use your heat protectant. Some recommend applying before blow drying and again before flat ironing.*


4. Blow Dry. For me, how well I blow dry Amara's hair will affect how straight her hair gets when flat ironing. This may not be for everyone but it is for me. I blow dry using a paddle brush with the dryer set to warm. You may choose to blow dry using the tension method if that works best for you or the banding method if you want to reduce the amount of heat you're using. *If you need more moisture in your child's hair, you may add a leave in before blow drying*


5. Flat Iron. Let me stress the importance of using a QUALITY flat iron. You may have to shell out a few bucks for it. I use the CHI flat iron (aprox $115). Use small sections, no wider than your flat iron plates. It should only take one pass to get the hair straight, two MAX. 


Following these steps should leave your child with salon looking straight hair with no heat damage.

Hope you all enjoyed! Please comment and tell me your thoughts. Be honest with me so that I may improve where needed. 


*Here's the brand that I have. I purchased it from my local beauty supply for $9.99.*